What 300 key fobs looks like and other assorted info
category: offtopic [glöplog]
If you don't give a care about me or key fobs, you should probably go read another thread.
I just got back from the hackerspace I visit this weekend and I thought I would share some photos and process bits. These key fobs are destined for Revision 2014* as at this time I'm planning to go again. If for some very odd reason I cannot, I will certainly find someone going to send them to (but don't start applying to be that guy just yet; I will try my hardest to ensure I am actually there).
* I probably made some organizers cringe a bit. "It's too soon to be thinking abotu that!" In all seriousness, for such a large event they've probably already started some planning.
Anyway, on to the photos and stuff. Since the photos my camera takes are huge and not suitable for threads, I've resized them to something manageable. I've wrapped them in links so you want to see the half-camera sized versions just click them.
There's no "in progress" shots, sorry. If you want some I've captured that on the Nectarine forums and there's links to it in the Random "work in progress" shots thread.
This is the box I brought them back in:
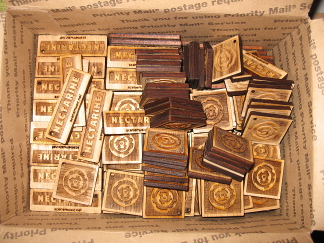
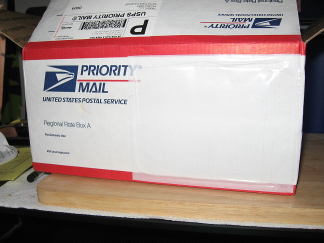
The box says "Regional Flat Box A" which means nothing to me. It's ~10" x ~5" x ~7" (width, height, depth) or 25.5 cm x 12.3 cm x 17.9 cm for those using a better system of measurement. I filled at least half of it; it is better packed on the right side than it appears on the top.
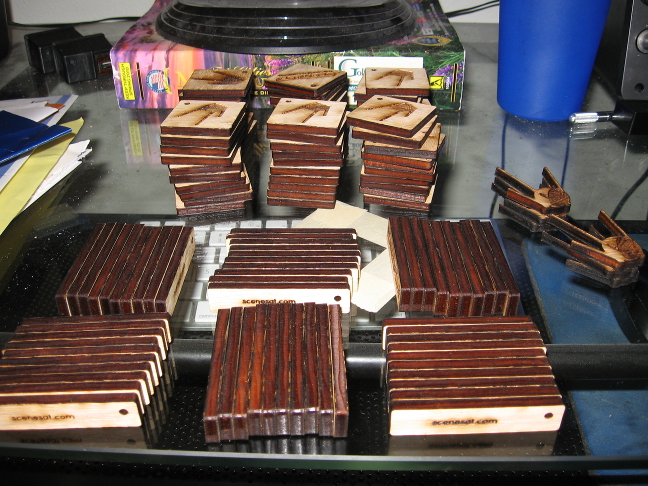
The stacks:
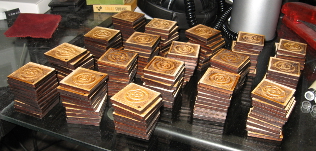
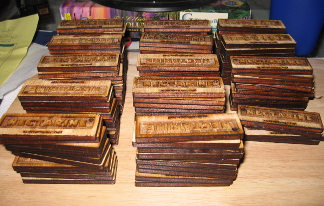
Each full stack is has 10 fobs in it. The far right in the last row of the Revision ones is only 9. I have 179 Revision ones and 133 Nectarine ones,* so I hope to go back and get a few more made to bring those up closer to 200. Other than variations in wood and so on, they generally should look the same as those I handed out already. The Revision ones might be a tad sharper.
* This count does not include those document in next three subsections.
Mistakes and rarities:
They don't always come out perfectly. I have a few where parts of the veneer pulled off just a little bit and one that has a knot-like thick spot near the edge. Since I hope to have so many this year, these probably won't be given out.
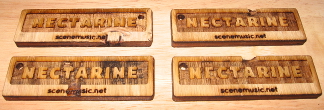
I also had two boards where there was a line missing. No filler, nothing. Just empty:
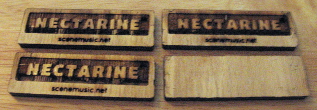

(I touched up these images a bit to make them easier to see, so colors might be a bit off.)
In the Nectarine ones, I ended up engraving both sides before I noticed except the last one there (blank back) so it goes all the way through. The Revision ones stop short of the veneer on the other side. Someone suggested I fill the Revision ones with colored epoxy for strength. They're certainly unique ...
Today is brought to you by the letter 'E':

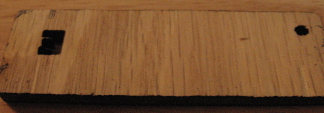
The operator tweaked something and in the process accidentally selected only one fob's final letter and set it to cut.
Thin lines:

These run on their big laser (the Nectarine ones on their smaller one) and due to the setup my job can be interrupted between sides to do someone else's job on the laser as long as you don't bump the grate my stuff is on or change the laser head's "origin". The laser head slammed in to the grate returning to origin after doing the other job which ripped the tape holding it in place. (The head has to be lower when not using the grate to get the proper focal length.) It was adjusted again after the first row. The other side looks just fine. They don't normally interrupt my jobs, but I was being a nice guy for someone else who needed in and out with something for Sunday morning. Hope it worked out for him! He had to stay there almost late as I did because of an issue that delayed running his next job. I think they're still okay to give out.
In this vein, I didn't get any pictures of them this time around, but I have a 7 where one side is misaligned. The other side looks just fine. They're kinda like the ones below, from this year, except all have the URL properly etched in the right place and they all have a close-to-full-size "Nectarine" engraved area.
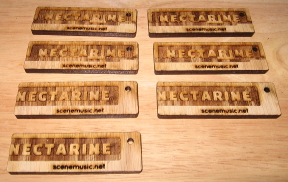
I'll probably hand them out last, unless someone explicitly wants one. They're due to a wobbling tensioner and thus a loose belt (which caused a one-time skip). Everything was tightened again for my next runs, but unfortunately one run had to be aborted because of this.
and finally, the rarity (or, the "who cares?" ones):
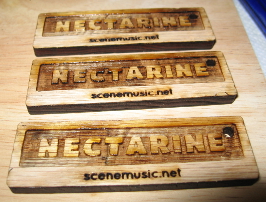
These three were recut to replace ones that didn't make it (at no extra charge) in the margins of a board so the grain goes the other way compared to all the others. Otherwise they're perfectly fine. Most people probably don't care about this sort of detail, but I'm not likely to explicitly make any going this way again.
Costs:
What some people want to know. They're certainly more costly than 16¢ apiece vinyl stickers (but cause less trouble with the orgas ;).
The Nectarine key fobs cost about the same as before per fob at $2.84 and the Revision ones cost $2.56 a piece. (The larger laser is slightly faster.) If I make the remaining I want to get to 200, their cost will drop by 20 to 40¢.* Anyway, it boils down to being €3 to cover me and not take a bath.
* This is because my calculations this time around include fixed cost things I didn't last time (which is awesome for me). I got that much better of a base rate for laser time this run. Really. I love that place!
I would also like to give anonymous credit to those who were generous enough (anything is considered generous) to donate something back after receiving one or one of each at Revision this year. Thank you very much. I really appreciate it.
(It also enables some to be given out for free.)
Lastly, no SceneSat fobs. I need to rework the back-side of one of the designs and I didn't have any time this trip to make any beyond those above and I was at the hackerspace from open to close. Some may appear later, though, and perhaps at Revision as well. but I'm not making definitive promises there, only wishy-washy ones.
Thanks for reading!
I just got back from the hackerspace I visit this weekend and I thought I would share some photos and process bits. These key fobs are destined for Revision 2014* as at this time I'm planning to go again. If for some very odd reason I cannot, I will certainly find someone going to send them to (but don't start applying to be that guy just yet; I will try my hardest to ensure I am actually there).
* I probably made some organizers cringe a bit. "It's too soon to be thinking abotu that!" In all seriousness, for such a large event they've probably already started some planning.
Anyway, on to the photos and stuff. Since the photos my camera takes are huge and not suitable for threads, I've resized them to something manageable. I've wrapped them in links so you want to see the half-camera sized versions just click them.
There's no "in progress" shots, sorry. If you want some I've captured that on the Nectarine forums and there's links to it in the Random "work in progress" shots thread.
This is the box I brought them back in:
The box says "Regional Flat Box A" which means nothing to me. It's ~10" x ~5" x ~7" (width, height, depth) or 25.5 cm x 12.3 cm x 17.9 cm for those using a better system of measurement. I filled at least half of it; it is better packed on the right side than it appears on the top.
The stacks:
Each full stack is has 10 fobs in it. The far right in the last row of the Revision ones is only 9. I have 179 Revision ones and 133 Nectarine ones,* so I hope to go back and get a few more made to bring those up closer to 200. Other than variations in wood and so on, they generally should look the same as those I handed out already. The Revision ones might be a tad sharper.
* This count does not include those document in next three subsections.
Mistakes and rarities:
They don't always come out perfectly. I have a few where parts of the veneer pulled off just a little bit and one that has a knot-like thick spot near the edge. Since I hope to have so many this year, these probably won't be given out.
I also had two boards where there was a line missing. No filler, nothing. Just empty:
(I touched up these images a bit to make them easier to see, so colors might be a bit off.)
In the Nectarine ones, I ended up engraving both sides before I noticed except the last one there (blank back) so it goes all the way through. The Revision ones stop short of the veneer on the other side. Someone suggested I fill the Revision ones with colored epoxy for strength. They're certainly unique ...
Today is brought to you by the letter 'E':
The operator tweaked something and in the process accidentally selected only one fob's final letter and set it to cut.
Thin lines:
These run on their big laser (the Nectarine ones on their smaller one) and due to the setup my job can be interrupted between sides to do someone else's job on the laser as long as you don't bump the grate my stuff is on or change the laser head's "origin". The laser head slammed in to the grate returning to origin after doing the other job which ripped the tape holding it in place. (The head has to be lower when not using the grate to get the proper focal length.) It was adjusted again after the first row. The other side looks just fine. They don't normally interrupt my jobs, but I was being a nice guy for someone else who needed in and out with something for Sunday morning. Hope it worked out for him! He had to stay there almost late as I did because of an issue that delayed running his next job. I think they're still okay to give out.
In this vein, I didn't get any pictures of them this time around, but I have a 7 where one side is misaligned. The other side looks just fine. They're kinda like the ones below, from this year, except all have the URL properly etched in the right place and they all have a close-to-full-size "Nectarine" engraved area.
I'll probably hand them out last, unless someone explicitly wants one. They're due to a wobbling tensioner and thus a loose belt (which caused a one-time skip). Everything was tightened again for my next runs, but unfortunately one run had to be aborted because of this.
and finally, the rarity (or, the "who cares?" ones):
These three were recut to replace ones that didn't make it (at no extra charge) in the margins of a board so the grain goes the other way compared to all the others. Otherwise they're perfectly fine. Most people probably don't care about this sort of detail, but I'm not likely to explicitly make any going this way again.
Costs:
What some people want to know. They're certainly more costly than 16¢ apiece vinyl stickers (but cause less trouble with the orgas ;).
The Nectarine key fobs cost about the same as before per fob at $2.84 and the Revision ones cost $2.56 a piece. (The larger laser is slightly faster.) If I make the remaining I want to get to 200, their cost will drop by 20 to 40¢.* Anyway, it boils down to being €3 to cover me and not take a bath.
* This is because my calculations this time around include fixed cost things I didn't last time (which is awesome for me). I got that much better of a base rate for laser time this run. Really. I love that place!
I would also like to give anonymous credit to those who were generous enough (anything is considered generous) to donate something back after receiving one or one of each at Revision this year. Thank you very much. I really appreciate it.
(It also enables some to be given out for free.)
Lastly, no SceneSat fobs. I need to rework the back-side of one of the designs and I didn't have any time this trip to make any beyond those above and I was at the hackerspace from open to close. Some may appear later, though, and perhaps at Revision as well. but I'm not making definitive promises there, only wishy-washy ones.
Thanks for reading!
What wood it look like with an even coat of varnish instead of epoxy? curious to see what light sandpapering to get rid of burn marks followed by a dark varnish + second clear epoxy.
There's actually no extra epoxy on them. If you're referring to the "shine" I get with a camera flash, it's the remaining bits of glue from the underlayer since I burned through the veneer. The ones I gave out at Revision 2014 (or sold online as with some of the Nectarine ones) were as you see above, unfinished.
I have given thought to doing a few coats of low-gloss polyurethane on them, but I need to do a bit of testing on that. It's a cop-out but leaving them uncoated allows people to do their own thing if they want. However, I'm pretty sure most people don't.
I don't know about sanding, I know it gives better adhesion to polyurethane and such but I tend to like the burnt look and the surfaces of these (even the veneer) are actually relatively rough. A quick previous test with some gloss stuff adhered pretty well for a first coat.
gave out at Revision 2013*
how many bucks if you do one revision thingy mechanical, two sided, nice slight orange tinted hardwood and a supersmooth polished finish, maybe rough engraving with a glimpse of an oil layer to darken it a lil? :D
prizeless.
prizeless.
Oohhh. Sorry for the multiposting, but if you meant epoxy in reference to those with the line missing in them (second image set in the mistakes section) the epoxy idea wasn't for coating them. It was to fill the hole so they don't collapse. With a clear or colored epoxy, it might look quite interesting.
Quote:
by logged out:
how many bucks if you do one revision thingy mechanical, two sided, nice slight orange tinted hardwood and a supersmooth polished finish, maybe rough engraving with a glimpse of an oil layer to darken it a lil? :D
prizeless.
Uhhh, mechanical? These things aren't very large either in width/length or height (5mm). I'm not sure I'd be able to make anything move, and I'd need to switch to a thinner wood (3mm maybe?) to get a sandwich to contain gears. I don't think I could do it.
what? move? *facepalms* ehh. nope. misunderstood. just not toast the wood. use mechanical tools to engrave, you know? that's kinda "oldschool".
Ah, I see what you're getting at. That could be done, but I'd still have to go to a place to borrow tools for cutting out the fob shape from the board and drill the ring hole. I should think it would cost quite a bit more, but only because it takes much more of my time actually doing stuff. (I can get other things done on my laptop while waiting for those above out at the hackerspace.) Unfortunately for you, I doubt I'd make any this way. Sorry. However I don't own the design and there's nothing really ownable about the idea using it to make a square key fob so you're quite free to do it if you like.
but for the fun of being a pedant, technically a laser cutter is mechanical with a belt and motors to move the head back and forth. It just happens to have a laser attached to it. That burns things. :D
(Most of them actually offer a sort of manual control for moving them around, which can be used to make very simplistic cuts without downloading a design to it from the computer, but I'm definitely sure that doesn't count for what you want either.)
those look really cool!
Thanks nosfe!
Whoops! So I went back and snapped a photo of them which I linked below that section. That photo is of the 7 I speak of. I was going to link to a photo from the Revision 2013 set, but decided I couldn't be so lazy as to not pick up the camera again ... Now I guess I get nailed for a bad proof-reading.
Quote:
by AMcBain:
In this vein, I didn't get any pictures of them this time around, but I have a 7 where one side is misaligned. The other side looks just fine. They're kinda like the ones below, from this year, except all have the URL properly etched in the right place and they all have a close-to-full-size "Nectarine" engraved area.
Whoops! So I went back and snapped a photo of them which I linked below that section. That photo is of the 7 I speak of. I was going to link to a photo from the Revision 2013 set, but decided I couldn't be so lazy as to not pick up the camera again ... Now I guess I get nailed for a bad proof-reading.
Key fob deluge part 2!
So had an idea at some point I think before I started this year's production runs for the Nectarine and Revision key fobs to do something for SceneSat. They were prototyped around the time of the production runs. The end result was two credible designs that I put up a vote app for. Interestingly very few people wanted both, most wanted one or the other. Unfortunately people were split almost 50-50 for each making it harder to get a decent quantity of either.
This is the end result of this past weekend's trip:
So the links don't go anywhere ... because I accidentally hit submit instead of preview. $%Q#$W$% buttons!
In 10 or so minutes I'll have a new post with the right post with the correct writeup!
In 10 or so minutes I'll have a new post with the right post with the correct writeup!
Key fob deluge part 2! (take 2 at part 2)
So had an idea at some point I think before I started this year's production runs for the Nectarine and Revision key fobs to do something for SceneSat. They were prototyped around the time of the production runs. The end result was two credible designs that I put up a vote app for. Interestingly very few people wanted both, most wanted one or the other. Unfortunately people were split almost 50-50 for each making it harder to get a decent quantity of either.
This is the end result of this past weekend's trip:


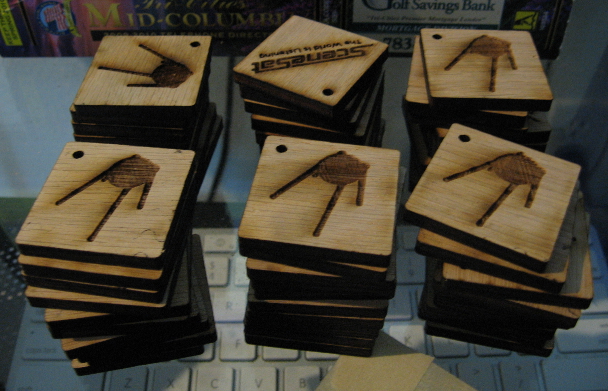
There's 60 of each of the squares and rectangles, and 6 of the Spuniks.
Front side of the rectangle:

They're about 6.3cm long by 1.3cm wide and 5mm thick. (2.5" x ~1" x ~3/16") This makes them smaller than the Nectarine ones by a noticeable amount.

Unfortunately I had planned to put the same engraving on the front as the back, but I realized the hole would cut in to the "at" if I did so. Ideas people and I had were mirroring the engraving to fit, lengthening the piece, and putting the URL on the back. Truck's proposition of the URL ended up being the cleanest. I had also tried to put a really small engraved Sputnik back there too, but decided it looked nice and clean with just the URL.
The squuuaaares:


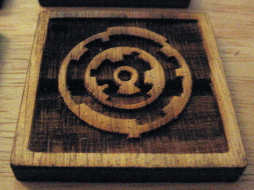
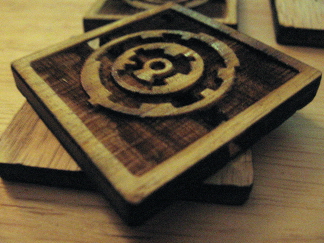
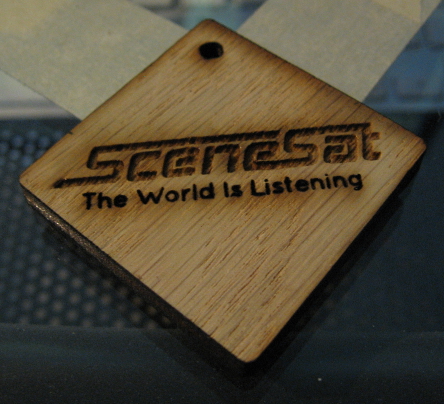
Not much to say here. Uses the same form-factor as the Revision ones. A lot of empty space on the one side.
Sputnik:


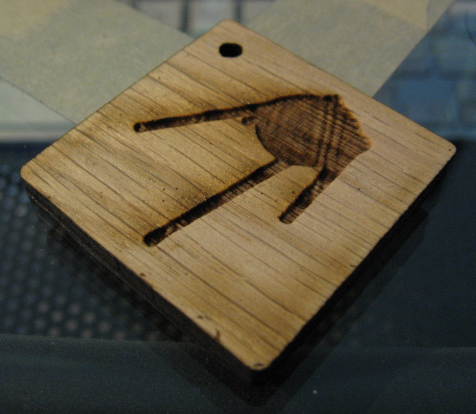
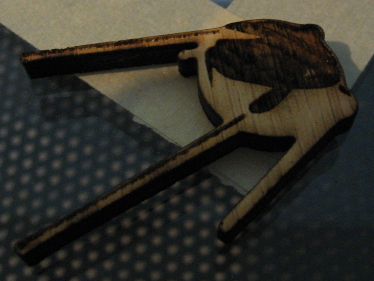
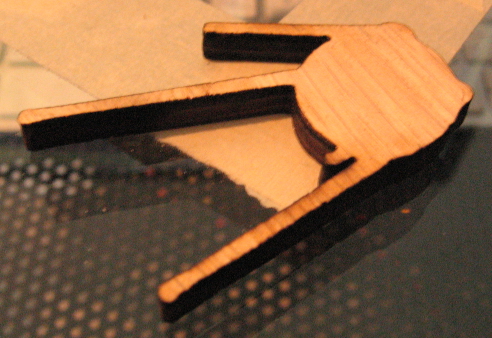
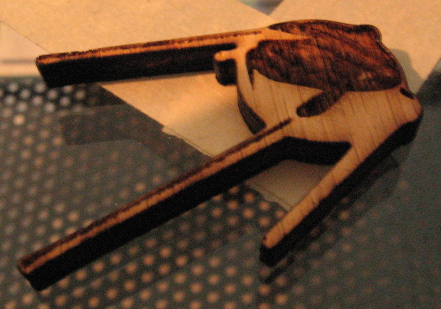
Now these, I hate. I don't hate Sputnik, I hate my wood-based representation as a cut-out. When I originally did the tests I had a very high rate of failure: it had to be re-cut many times and most didn't come out of the board. I offered it anyway thinking I could resolve that, and tried to get my jobs done on the large laser at the hackerspace so all 100 Watts of it could really punch these things out.
However, it's more set up for cutting (in terms of how tightly focused the laser is) compared to their small laser, and so the URL in the rectangles never came out right. Since everything was originally in one file (sheet), that was important. So I switched to the small laser to run the job, and ended up breaking out the designs into separate files and none of it ended up running on the big laser. (The probably would have come out a little fuzzy if I had.)
So out of all 24 I tried to cut, I got 6. Now you know why I'm unhappy. I don't have a scientific explanation or anything other than since there's not a lot of straight lines it's possible that even at slower speeds, the small laser's 40 Watts just can't spend enough time to go all the way through.
There is a positive side though: The hackerspace I go to doesn't charge you for failures that are due to reasons not based in design.* So they comped the run of Sputniks. Now, I could have done another run out of 3mm wood, but I had enough to do while out there that it wasn't worth my time to do so. 3mm would also make these things even more fragile. So I skipped.
* Meaning you don't get a pass just because you realized your design sucks (or is wrong) but the actual item came out just fine accounting for that.
They're single sided because it would be really hard to be able to do the backside with an asymmetric design. I don't think it would be impossible, but you'd be spending a lot of your time lining up and testing the laser to do the backside pass with the board flipped to reverse the jig left over from doing the first pass. So I didn't even give doing so any thought.
Finally, no pictures of tests or screw-ups. The tests are kinda boring (fuzzy "scenesat.com"s, and too lightly engraved very tiny Sputniks) and I don't have pictures of the board where the Spuniks didn't come out. Other than that, though, no mistakes in the runs which I think is stellar. If wanted, though, I can post some pictures of the test pieces.
I may not make any more for a while, for a few reasons. The first is directly monetary, the second is that my super-awesome cutting rate ends after next weekend and I don't have enough stuff to do to make re-upping for the same membership level cost effective. I could do a lesser membership level, but the rate is not nearly as good though better than the walk-in rate. This isn't in stone, but my mind would have to be changed before next weekend. ;)
As to relative costs, they would be around € 2.66 (rectangle), € 3.38 (square) as to minimums. To not have to deal with a lot of Euro coins I'd probably ask for something rounded up.
So had an idea at some point I think before I started this year's production runs for the Nectarine and Revision key fobs to do something for SceneSat. They were prototyped around the time of the production runs. The end result was two credible designs that I put up a vote app for. Interestingly very few people wanted both, most wanted one or the other. Unfortunately people were split almost 50-50 for each making it harder to get a decent quantity of either.
This is the end result of this past weekend's trip:
There's 60 of each of the squares and rectangles, and 6 of the Spuniks.
Front side of the rectangle:
They're about 6.3cm long by 1.3cm wide and 5mm thick. (2.5" x ~1" x ~3/16") This makes them smaller than the Nectarine ones by a noticeable amount.
Unfortunately I had planned to put the same engraving on the front as the back, but I realized the hole would cut in to the "at" if I did so. Ideas people and I had were mirroring the engraving to fit, lengthening the piece, and putting the URL on the back. Truck's proposition of the URL ended up being the cleanest. I had also tried to put a really small engraved Sputnik back there too, but decided it looked nice and clean with just the URL.
The squuuaaares:
Not much to say here. Uses the same form-factor as the Revision ones. A lot of empty space on the one side.
Sputnik:
Now these, I hate. I don't hate Sputnik, I hate my wood-based representation as a cut-out. When I originally did the tests I had a very high rate of failure: it had to be re-cut many times and most didn't come out of the board. I offered it anyway thinking I could resolve that, and tried to get my jobs done on the large laser at the hackerspace so all 100 Watts of it could really punch these things out.
However, it's more set up for cutting (in terms of how tightly focused the laser is) compared to their small laser, and so the URL in the rectangles never came out right. Since everything was originally in one file (sheet), that was important. So I switched to the small laser to run the job, and ended up breaking out the designs into separate files and none of it ended up running on the big laser. (The probably would have come out a little fuzzy if I had.)
So out of all 24 I tried to cut, I got 6. Now you know why I'm unhappy. I don't have a scientific explanation or anything other than since there's not a lot of straight lines it's possible that even at slower speeds, the small laser's 40 Watts just can't spend enough time to go all the way through.
There is a positive side though: The hackerspace I go to doesn't charge you for failures that are due to reasons not based in design.* So they comped the run of Sputniks. Now, I could have done another run out of 3mm wood, but I had enough to do while out there that it wasn't worth my time to do so. 3mm would also make these things even more fragile. So I skipped.
* Meaning you don't get a pass just because you realized your design sucks (or is wrong) but the actual item came out just fine accounting for that.
They're single sided because it would be really hard to be able to do the backside with an asymmetric design. I don't think it would be impossible, but you'd be spending a lot of your time lining up and testing the laser to do the backside pass with the board flipped to reverse the jig left over from doing the first pass. So I didn't even give doing so any thought.
Finally, no pictures of tests or screw-ups. The tests are kinda boring (fuzzy "scenesat.com"s, and too lightly engraved very tiny Sputniks) and I don't have pictures of the board where the Spuniks didn't come out. Other than that, though, no mistakes in the runs which I think is stellar. If wanted, though, I can post some pictures of the test pieces.
I may not make any more for a while, for a few reasons. The first is directly monetary, the second is that my super-awesome cutting rate ends after next weekend and I don't have enough stuff to do to make re-upping for the same membership level cost effective. I could do a lesser membership level, but the rate is not nearly as good though better than the walk-in rate. This isn't in stone, but my mind would have to be changed before next weekend. ;)
As to relative costs, they would be around € 2.66 (rectangle), € 3.38 (square) as to minimums. To not have to deal with a lot of Euro coins I'd probably ask for something rounded up.
I'm honestly not trying to spam my way back to the top. I thought I would share some process photos and things I tried that either didn't quite work or I decided not to go ahead with. It was fairly late when I did the last post so I didn't want to go back and photograph more stuff right then.
These tests were done on the back side of a sheet that was an aborted Nectarine key fob run, so a few have bits of "NECT", "RINE", or "NE" on the reverse. (Which I didn't capture a photo of.)
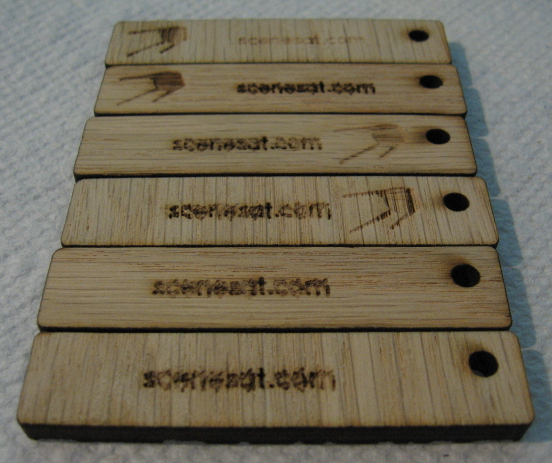
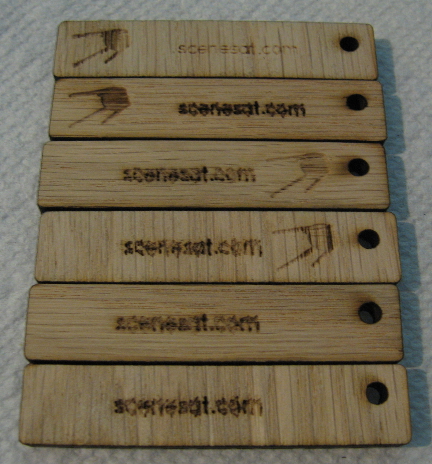
These are alternate backs I mentioned in the last post. Using the two values of truck's calculation of a good place to put the URL etching, I tried it also with a small Sputnik. These were done on the large laser mentioned previously, and it is not focused for fine detailing as can be seen quite well here. The Sputnik could be made visible enough, but I ended up deciding it was just clutter.
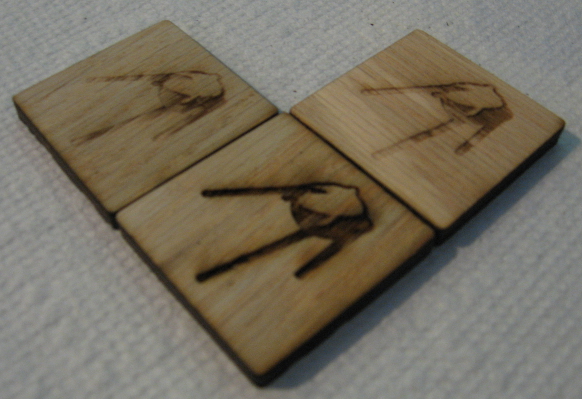
I believe these were also done on the large laser, but I don't remember. Someone had suggested I try making the Sputnik's on the back of the square design more like the cut-outs, with the shiny part raised. It took a bit to get the depth right, but in the end both the person on duty and I decided the raised part didn't really add anything to the fob, so it was dropped. Another reason for that was engraving is done left to right and top to bottom, so not engraving a section encased entirely inside the engraved section doesn't save any time running the piece.
The coins:
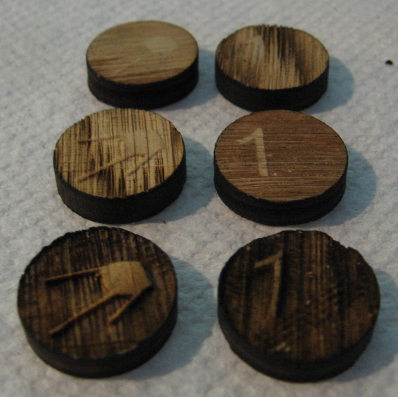
I can write a lot about these ... so the Sputnik cut-outs have the long antennas which leaves spaces between them even with how tightly I was able to pack them in to the production sheet design. I figured out this space was large enough (with a small margin beside) to fit something .75" tall, which is the size of a US penny. Riffing on that, I decided to try to fill the space with a coin.
The idea of the coin was the front would say "scenesat.com" arced across the top, with Sputnik below it, and the numbers "2014" between the antennas on the left. Everything would be engraved out to leave the rest raised up, like a real coin. You can barely see some lines that don't fit the grain at the top of the lowest coin in the image. On the backside, the coin was to say "we love the scene", "1 cent", and have some diagonal lines like the Euro cent.
However It turns out due to the nature of my 5mm wood this doesn't work very well at all, and only the larger things survive. I would have either needed to make the coin bigger to allow more things to be larger (and thus survive the engrave), make it simpler, or use a different kind of plywood. The first and last choices defeated the original purpose: helping using the entire board. In the end, I ended up splitting up my huge production run sheet into multiple files to run, but I decided it wasn't worth my time to rework and rerun the coins.
I'm also not really sure what having a wooden SceneSat cent would grant you, because even if it was real tender there wouldn't be enough for even one person to buy anything. ;)
These tests were done on the back side of a sheet that was an aborted Nectarine key fob run, so a few have bits of "NECT", "RINE", or "NE" on the reverse. (Which I didn't capture a photo of.)
These are alternate backs I mentioned in the last post. Using the two values of truck's calculation of a good place to put the URL etching, I tried it also with a small Sputnik. These were done on the large laser mentioned previously, and it is not focused for fine detailing as can be seen quite well here. The Sputnik could be made visible enough, but I ended up deciding it was just clutter.
I believe these were also done on the large laser, but I don't remember. Someone had suggested I try making the Sputnik's on the back of the square design more like the cut-outs, with the shiny part raised. It took a bit to get the depth right, but in the end both the person on duty and I decided the raised part didn't really add anything to the fob, so it was dropped. Another reason for that was engraving is done left to right and top to bottom, so not engraving a section encased entirely inside the engraved section doesn't save any time running the piece.
The coins:
I can write a lot about these ... so the Sputnik cut-outs have the long antennas which leaves spaces between them even with how tightly I was able to pack them in to the production sheet design. I figured out this space was large enough (with a small margin beside) to fit something .75" tall, which is the size of a US penny. Riffing on that, I decided to try to fill the space with a coin.
The idea of the coin was the front would say "scenesat.com" arced across the top, with Sputnik below it, and the numbers "2014" between the antennas on the left. Everything would be engraved out to leave the rest raised up, like a real coin. You can barely see some lines that don't fit the grain at the top of the lowest coin in the image. On the backside, the coin was to say "we love the scene", "1 cent", and have some diagonal lines like the Euro cent.
However It turns out due to the nature of my 5mm wood this doesn't work very well at all, and only the larger things survive. I would have either needed to make the coin bigger to allow more things to be larger (and thus survive the engrave), make it simpler, or use a different kind of plywood. The first and last choices defeated the original purpose: helping using the entire board. In the end, I ended up splitting up my huge production run sheet into multiple files to run, but I decided it wasn't worth my time to rework and rerun the coins.
I'm also not really sure what having a wooden SceneSat cent would grant you, because even if it was real tender there wouldn't be enough for even one person to buy anything. ;)
Don't you think the sputnik antennas are very likely to break?
I want a SceneSat one!
Quote:
by Saga Musix:
Don't you think the sputnik antennas are very likely to break?
It is more likely than the key fobs, yes, but if you don't throw it in the bottom of your bag and dump a bunch of stuff on top I think it should be fine. It wasn't intended as a fob, so likely it would be put next to computer monitors, on altars, and wherever else the fobs went that wasn't a key ring. I likely will just hand off those Sputnik's to truck, Ziphoid, or some such, as there's so few.
However, I had a thought to make some out of acrylic with the text "scenesat.com" following the contour around the top (just so it's not a plain Sputnik cut-out as the highlight engraving would look bad). Unless I go out this coming weekend, there probably won't be any of those. I generally don't do acrylic because I don't have my own and buying from the hackerspace is more expensive than cost of materials I get with my own wood or buying some of theirs.
Quote:
by djh0ffman:
I want a SceneSat one!
\o/
i'm not a keyfob fan but i read the thread anyway because of having worked in a lasercutting factory some years ago. i may be mistaken but since you talk in detail about prices i figure that is an issue to you and then i have to wonder if you have considered outsourcing production? those prices are fine from a hobby perspective, don't get me wrong, i'd love to have a facility where i could hack around with that kind of stuff in my area and i'd probably be willing to pay more for it. but from a production/commercial POV, it sounds like a high price for this type of item (the aluminium bottleopener keyring thing we did for our party a few years back worked out at ~€0.65/piece).
Quote:
by havoc:
i may be mistaken but since you talk in detail about prices i figure that is an issue to you and then i have to wonder if you have considered outsourcing production?
In a sense, it is, mainly because these are primarily for Revision 2014, which is next spring. Why do them now? Well last time I did them about a month and a half before I left for the party and I wondered if I'd made enough, and decided during the party I didn't have nearly enough Revision ones. However doing them now means I have a personal budget deficit that gets equalized by a hopeful surplus at Revision. Not exactly fun from a monetary standpoint but I think the end result is (or will be) worth it.
As to the question itself, no and yes. No, I didn't really look in to other places to potentially get this done. It seemed easy enough to do it at the "local" hackerspace to me where I'd already done quite a bit of personal stuff and had gotten to know people. I like supporting them. It is an easy way to get something done out of wood that was automated but still more homemade (not quite the right word) than perhaps other swag or trinkets. However this is not a dis to those who made and handed out stickers, heck I didn't even really know that was quite a "thing" until I showed up to Revision 2013.
As to yes, well, some time after I made the first batch of fifty Nectarine key fobs (which I sold through a website of mine), I considered having them made out of plastic (not acrylic) via Shapeways, but I'm lacking in the 3D modelling design skills department at the moment, so the result with one of their quick black and white extrusion uploaders resulted in subpar crap. Had I been able to make something credible, it might have been worth making it available to the public for sale, and I don't have to worry about being a distributor (shipping). As a bonus, people can pick whatever material they want. In theory an appropriate model could be around the existing wooden key fob cost. On the flip-side though, Shapeways doesn't try to be a cheap offering due to their nature, and doing anything out of metal might require a few fingers (as opposed to an arm and a leg) in costs.
If I wanted something out of metal, I'd need a real 3D model (not the flat 2D vector graphic I have now) and would might have a large up front cost for some sort of mold/stamp whatnot to get going, even if those after are dirt cheap.
Anyway, I went a bit long there ... the basic thing is that I don't have access to contacts for that sort of stuff right now to get going on it, and really I think the idea/meaning of it is sort of lost if I say "oh, well, I can make 500 of them cheap, here have 3". But again, not a dis, just how I feel about it a little bit. The future may change ... I'm sure if SceneSat wanted more of these things it probably would be better to look in to something more consistent and sustainable.
(As an aside here, one person had suggested interesting in a plastic and/or metal version of the Nectarine fob, so it's likely that if I found a way there would be people who would hop on it. I also hope I don't bring down my whole thing by saying this, but I can't really, and don't, claim ownership over the designs I'm using here. Sure, it took time to come to the design that got produced, but they're basically standard stuff inside of rectangles and squares. If someone wanted to do so, they wouldn't need my permission to make their own Nectarine key fob. I just really seem to be the first one to the idea to make a lot of them and be quite visible about it. That, and nobody has ever actually asked for the raw design files. They're not particularly magic, but some of them might be in non-metric units.)
Quote:
by havoc:
those prices are fine from a hobby perspective, don't get me wrong, i'd love to have a facility where i could hack around with that kind of stuff in my area and i'd probably be willing to pay more for it.
I think that's part of it, people seem willing to pay for something that's (currently) unique and different, as long as it's not exorbitant. You should check out http://hackerspaces.org/wiki/. They have a list of most of the known hackerspaces out there and planned ones. Their large list by city sucks to navigate or filter though, so I'd use the search box instead. If you find ones with a website, all the better, because they might have a contact (e-mail, phone, hours) and a list or at least passing reference to the kind of tools they have.
The one I go to is great, because they take walk-ins. You don't need to have a membership to get anything done. It just costs more than if you are a member. However, it isn't close by. I drive three hours one way to get there and usually spend the day (Saturday) then come back. The past two times I've gone I've stayed over so I could get some acrylic cutting done (right now it is limited to Sundays and Mondays, though last weekend I got hints that might change).
Quote:
by havoc:
but from a production/commercial POV, it sounds like a high price for this type of item (the aluminium bottleopener keyring thing we did for our party a few years back worked out at ~€0.65/piece).
Indeed the place I go can do these production runs, but it is not a factory. Thus it has slightly higher prices to help keep the space running. However, I think I should have just left out the raw costs above. People don't really seem to care to know, and as long as the final cost is reasonable people seem willing to pay it knowing how they were made.
Now on the raw costs above, they're actually somewhat off, and not because I made a mistake in my accounting or that a receipt was bad, etc. The calculations for the costs above were due to stove-pipping the production run costs and fixed costs of making the trip itself.* So a fuzzy version of my equation, as I am cannot access my spreadsheet right now, is similar to the following for a single trip.
* Cost of gas is not an insignificant cost input for a 200+ mile three hour trip done twice, if what you're having produced is the only reason for the trip. Lunch, snacks, and that sort of thing are a strictly personal expense, however, and not included in this.
Code:
c / r + f / t

c: total cost to make all of one design
r: total made of one design
f: fixed costs of trip
t: total (of all designs) made on trip
I knew, though, that making more could reduce per-item costs. Thus the Revision and Nectarine ones were actually the result of distribution of the fixed costs of the two trips I made then but each design was still based on their own production cost from both the trips.
What I didn't try until I came back from the last trip was sharing all costs across all trips and all designs, to come to a single price for each regardless of the design. That not only makes them easier to try to sell, but it reduced the per-fob cost of most of them. So the reality is--and I might as well say it, as I've already posted the previous values--the current best cost with no margin is about € 2.50, but again I'm not at all near my computer with the spreadsheet.
Anyway, I hope that provides some insight and that I don't sound like a gas bag. Let me know if I missed the point of something, or something else entirely.
As an addendum, I should note that the above shouldn't be interpreted that I'm purposely going for a higher-cost option because someone might pay it. I like cheaper too. When making these runs I figured out it was cost effective to buy a full membership at the hackerspace to get the best possible base rate further reduced by the discount offered after paying a one-time production run fee. (That fee was already paid for the Nectarine and Revision ones long ago, SceneSat's was paid on the last trip.) The first run of Nectarine ones and the later ones for Revision, being staggered, didn't make it cost-effective at the time to get the full membership. I did utilize a lower membership and the production run fee, however. If I was able to see in to the future when I did the first run, I might have decided to make enough then to pass the break even point of getting the full membership.
nah man this is interesting stuff, thanks for the insight :) it's obvious that you're putting a lot of time and effort into this and i think it's absolutely fair to get compensated for that. also, if people don't like the idea or the price or whatever, they can simply not buy your product.
something that crossed my mind when i read that- back when i worked at that lasercutting place i did a bunch of signs/objects/decorations with several stacked sheetmetal layers and superglue. almost always these jobs were for customers who initially were asking for engraved versions of the same object. cutting is much faster/cheaper than engraving and ofcourse it's a 2d process, which saves you the trouble of making a 3d model. the items we made back then were usually much larger but scaled down the same technique could be used to make metal versions of your keyfobs for a decent price i think. most lasercutting places out here will do such jobs on pretty short notice for a standard fee (cm's to cut*thickness of the sheet+materials by weight).
other than that, awesome project, keep it going plz :)
Quote:
doing anything out of metal might require a few fingers (as opposed to an arm and a leg) in costs.
If I wanted something out of metal, I'd need a real 3D model (not the flat 2D vector graphic I have now) and would might have a large up front cost for some sort of mold/stamp whatnot to get going, even if those after are dirt cheap.
something that crossed my mind when i read that- back when i worked at that lasercutting place i did a bunch of signs/objects/decorations with several stacked sheetmetal layers and superglue. almost always these jobs were for customers who initially were asking for engraved versions of the same object. cutting is much faster/cheaper than engraving and ofcourse it's a 2d process, which saves you the trouble of making a 3d model. the items we made back then were usually much larger but scaled down the same technique could be used to make metal versions of your keyfobs for a decent price i think. most lasercutting places out here will do such jobs on pretty short notice for a standard fee (cm's to cut*thickness of the sheet+materials by weight).
other than that, awesome project, keep it going plz :)
Quote:
by havoc:
i think it's absolutely fair to get compensated for that. also, if people don't like the idea or the price or whatever, they can simply not buy your product.
heh, yeah. Though I found through the vote app for the SceneSat fobs before I did the production runs that there are a few people who would only take one if they were free. Overwhelmingly though people were willing to buy one. So bringing down costs drastically may attract a few more people, but given the small number they aren't worth chasing after with my current process.
Quote:
by havoc:
something that crossed my mind when i read that- back when i worked at that lasercutting place i did a bunch of signs/objects/decorations with several stacked sheetmetal layers and superglue. almost always these jobs were for customers who initially were asking for engraved versions of the same object. cutting is much faster/cheaper than engraving and ofcourse it's a 2d process, which saves you the trouble of making a 3d model. the items we made back then were usually much larger but scaled down the same technique could be used to make metal versions of your keyfobs for a decent price i think. most lasercutting places out here will do such jobs on pretty short notice for a standard fee (cm's to cut*thickness of the sheet+materials by weight).
I think I see. Break up the piece into a punch-out layer and a base-plate then combine. That's actually sort of how the Shapeways plastic ones I did worked. The only problem with Shapeways was that due to the simplistic nature of the uploader I couldn't put a hole in the base-plate for the key ring.
Though I am unsure how would this work for doing something like the Nectarine key fob with raised lettering, as there's nothing to attach it to the surrounding outline once cut. You could still glue on the letters, but consistency would be harder. The SceneSat ones, of course, would be easy to do by this process.
It might be something worth investigating for after Revision 2014, as I'm unsure at this point exactly where this project will go from then. Doing these trips to get them made is fun and all, but it is a bit of an endeavor. I still have to get around to seeing if I can consistently polyurethane these things.
But that is only for the personal-driven public stuff above.* Anyone who has (or will) talked with me about stuff for the future, I'm still open to things and haven't dropped you off my radar.
* None of the key fobs in this thread have been by request, to my knowledge.
Quote:
by havoc:
other than that, awesome project, keep it going plz :)
Thanks! Appreciate that, that you read the thread, and the insight you provided.
P.S.:
Quote:
by havoc:
i'm not a keyfob fan
That's okay, these key fobs have also ended up on altars, near monitors, on bookshelves ... ;)
they look really cool - but are kinda too large to wear them in your jeans pocket, aren't they?
Quote:
by dipswitch:
they look really cool - but are kinda too large to wear them in your jeans pocket, aren't they?
I shouldn't think so. A few people have reported using them on their key rings with no complaints, and one I believe found the square variant nicer for pockets, iirc. They might seem large due to most of my photos being close-ups?
Apparently I listed the dimensions above for one of the designs, but left off the rest. My apologies! I think I figured many already knew from having publicized these elsewhere, which was an invalid assumption.
Nectarine:
7cm x 2.15cm x 5mm (2.75" x 14.5/16th" x 3/16th")
SceneSat rectangles:
6.3cm long x 1.4cm tall x 5mm thick (2.5" long x ~.5" tall x 3/16" thick)
SceneSat and Revision squares:
3.9cm long x 5mm thick (~2" long x 3/16" thick)
I copied those dimensions from various other sources where I'd measured them already. There's probably a small variation between pieces, but nothing noticeably different.
